Spreadfirefox Affiliate Button
Custom Search

Tuesday, March 31, 2009

Koneksi telkom flash dengan Sony Ericsson P1i dan Ubuntu Intrepid Ibex Network Manager di Ubuntu Intrepid Ibex

Network Manager di Ubuntu Intrepid Ibex memberikan fasilitas yang lebih menyenangkan dan mudah termasuk untuk koneksi Broadband menggunakan Telkom Flash. Klik kanan pada icon network manager di taskbar dan pilih edit connections ... kemudian pilih Mobile Broadband. Langkah selanjutnya sangat intuitif.

Sayangnya, deteksi Sony Ericsson P1i saya di Ubuntu Intrepid kurang mantap. Kadang-kadang terdeteksi otomatis, kadang-kadang tidak. Jika terdeteksi, kita akan langsung dikoneksikan dengan Telkom Flash. Tapi jika tidak, applet Network Manager akan diam saja tanpa reaksi. Dengan perintah dmesg, terlihat bahwa Sony Ericsson P1i sebenarnya terdeteksi dengan konsisten oleh kernel. Jadi menurut dugaan saya ini adalah masalah di Network Manager.

Untuk rekan-rekan yang mengalami hal yang sama, saya bagikan sebuah skrip hasil utak-atik saya untuk mengatasi masalah ini. Untuk itu terlebih dahulu kita harus memodifikasi file /etc/wvdial.conf menjadi seperti ini (file ini harus diedit sebagai root):

# /etc/wvdial.conf -----------
[Dialer Defaults]
ISDN = off
Modem Type = Analog Modem
Baud = 460800
Phone = *99***1#
Dial Attempts = 1
Dial Command = ATM0L0DT
Ask Password = off
Password = wap123
Username = wap
Auto Reconnect = off
Abort on Busy = off
Carrier Check = off
Check Def Route = on
Abort on No Dialtone = off
Stupid Mode = on
Idle Seconds = 300
Auto DNS = on

[Dialer FlashVolumeBased]
Modem = /dev/ttyACM1
Init = ATZ
Init2 = ATQ0 V1 E1 S0=0 &C1 &D2 +FCLASS=0
Init3 = AT+CGDCONT=1, "ip", "telkomsel"

[Dialer FlashTimeBased]
Modem = /dev/ttyACM1
Init = ATZ
Init2 = ATQ0 V1 E1 S0=0 &C1 &D2 +FCLASS=0
Init3 = AT+CGDCONT=1, "ip", "internet"

# -------- selesai /etc/wvdial.conf ------

Lalu buat juga sebuah skrip yang saya beri nama connectd dan simpan di /usr/local/bin/


#!/bin/bash
# Notification daemon for connection through PPPD
#
# /usr/local/bin/connectd
# I use this personally to automate the internet connection
# through my Sony Ericsson P1i Cellular Phone
#
# Author : Dekrit Gampamole
# Email : dekrit@gampamole.net
#
# Requirements:
# Bash
# Zenity
# Gnome icon
# Licensed under GPL version 2
# Version 0.1

# Global Variables

modem_connected_to_pc=false
notification=false
previously_connected=false
connected_to_internet=false
sleeptime=5s
icon="/usr/share/icons/gnome/22x22/devices/ipod_mount.png"
# Change this according to your preferred package
# package=FlashTimeBased
package=FlashVolumeBased

# modem device
# set this according to your hardware automatic assignment
modem=/dev/ttyACM1

# Functions definitions
function check_modem_status(){
# Return global variable boolean modem_connected
if [ -c $modem ]; then
modem_connected_to_pc=true
else
modem_connected_to_pc=false
fi
}

function toggle_notification(){
# Toggle notification icon on the tray
if $connected_to_internet; then
if ! $previously_connected; then
killall zenity;
zenity --notification --window-icon=$icon --text="Connect" &
previously_connected=true
fi
else
if $previously_connected; then
killall zenity;
zenity --notification --text="Not connected" &
previously_connected=false
fi
fi
}

function connect(){
# Dial out
if ! $connected_to_internet; then
# Check whether wvdial is already running
if [ ! "$( ps aux | grep wvdial | grep conf )" ]; then
# if not: execute it
wvdial $package &
fi
fi
}

function check_connection_state(){
# Return global variable boolean connected_to_internet
# is pppd running?
if [ "$( ps aux | grep pppd | grep modem )" ]; then
connected_to_internet=true
else
connected_to_internet=false
fi
}

# Main function
function main(){
# the app
while (true); do
check_modem_status
check_connection_state
if $modem_connected_to_pc; then
connect
fi
toggle_notification
sleep $sleeptime
done
}

# Finally, execute it
main;

## selesai ---- /usr/local/bin/connectd

Skrip ini akan berfungsi sebagai daemon yang terus menerus memonitor apakah Sony Ericsson P1i sudah terhubung ke Laptop menggunakan kabel. Jika sudah terhubung maka skrip akan langsung melakukan koneksi ke internet. Jika koneksi sukses maka akan terlihat icon di Area Notifikasi pada Taskbar. Untuk menghentikan koneksi kabel boleh langsung dicabut dan icon notifikasi akan berubah menjadi icon segitiga kuning yang menyatakan tak ada koneksi.

Supaya skrip ini dijalankan otomatis setiap kali kita login ke Gnome, kita harus meletakkannya ke dalam Session Manager. Klik System > Preferensi > Sesi dan ikuti instruksi pada layar. Jangan lupa ubah Permission menjadi executable dengan perintah sudo chmod 755 /usr/local/bin/connectd.

Jika ingin segera melihat efeknya sekarang juga tekan Alt-F2 lalu ketik connectd dan klik Run. Hubungkan Sony Ericsson P1i anda dan tunggu beberapa saat sampai terlihat ada icon baru di Tray. Anda sudah terhubung ke internet.

Apakah Skrip ini bisa digunakan untuk modem yang lain? Jawabnya bisa. Caranya anda harus mengubah modem device sesuai nama device modem anda. Caranya hubungkan modem anda ke komputer, buka Terminal, ketikkan dmesg | tail. Perhatikan nama device tty yang baru terdeteksi. Akan terbentuk device baru di folder /dev/ dengan nama seperti yang tertera pada dmesg tadi.

Beberapa nama device yang umum adalah /dev/ttyACM0, /dev/ttyACM1 (seperti pada Sony Ericson P1i), /dev/ttyACM2. Jika memakai koneksi Bluetooth nama device biasanya adalah /dev/rfcomm0, dst. Ubah baris modem=/dev/ttyACM1 pada skrip di atas dengan nama device sesuai hasil deteksi.

Adakah cara lain yang lebih mudah? Untuk anda yang malas dengan perintah baris dan skrip yang membingungkan ini, silahkan install Gnome-PPP dengan perintah sudo apt-get install gnome-ppp, atau melalui Add/Remove Program pada menu. Sesudah terinstall, jalankan Gnome-PPP melalui menu Aplikasi>Internet>Gnome-PPP. Hubungkan modem anda (misalnya Sony Ericsson P1i atau Huawei E222) ke komputer, klik Setup, klik Detect. Kemudian klik Init Strings. Pada kolom Init string2 ketikkan AT+CGDCONT=1, "ip", "telkomsel" jika mau memakai telkom flash Volume-Based, atau ganti dengan "internet" jika mau memakai Time-Based.

Kenapa memakai skrip jika ternyata ada cara yang lebih gampang dengan Gnome-PPP? Jawab: saya malas tiap kali harus klik beberapa kali untuk melakukan koneksi. Lagipula jika koneksi tiba-tiba putus (sering terjadi), saya harus melakukan klik Connect lagi secara manual. Komputer tidak bisa ditinggalkan ketika melakukan download panjang karena tiap kali putus harus intervensi manual. Untunglah Linux penuh dengan kebebasan. Dengan mudah kita membuat sebuah program sederhana dengan peralatan seadanya tapi berfungsi sesuai keinginan kita. Skrip ini akan melakukan koneksi ulang secara otomatis jika koneksi terputus. Warning: hati-hati jika anda memakai paket Time-Based tagihan bisa membengkak, itu sebabnya saya memilih paket Volume-Based sebagai default.

Source : http://dekrit.blogspot.com

Monday, March 30, 2009

Ubuntu 9.04 "Jaunty" Upgrades

This is a draft page - Ubuntu 9.04 is currently in Beta.

Ubuntu 9.04 is the upcoming version of the Ubuntu operating system. The common name given to this release from the time of its early development was "Jaunty Jackalope".

Before You Start

  • You can only directly upgrade to Ubuntu 9.04 Beta from Ubuntu 8.10 (see UpgradeNotes).

  • Be sure that you have all updates applied to Ubuntu 8.10 before you upgrade.
  • Before upgrading it is recommended that you read the release notes for Ubuntu 9.04, which document caveats and workarounds for kn

    own issues in this version.

If you have a version of Ubuntu which was released before Ubuntu 8.10, please see UpgradeNotes for information on how to upgrade.

Network Upgrade for Ubuntu Desktops (Recommended)

You can easily upgrade over the network with the following procedure.

1. Press Alt-F2 and type update-manager --devel-release

2. Click the Check button to check for new updates.

3. If there are any updates to install, use the Install Updates button to install them, and press Check again after that is complete.

4. A message will appear informing you of the availability of the new release.

5. Click Upgrade.

6. Follow the on-screen instructions.

Network Upgrade for Ubuntu Servers (Recommended)

  1. Install update-manager-core if it is not already installed:

    sudo apt-get install update-manager-core
  2. Launch the upgrade tool:

    sudo do-release-upgrade --devel-release
  3. Follow the on-screen instructions.

Upgrading Using the Alternate CD/DVD

Use this method if the system being upgraded is not connected to the Internet.

  1. Download the alternate installation CD

  2. Burn the ISO to a CD and insert it into the CD-ROM drive of the computer to be upgraded.

    • If the ISO file is on the computer to be upgraded, you could avoid wasting a CD by mounting the ISO as a drive with a command like:

      sudo mount -o loop ~/Desktop/ubuntu-9.04-beta-alternate-i386.iso /media/cdrom0
  3. A dialog will be displayed offering you the opportunity to upgrade using that CD.
  4. Follow the on-screen instructions.

If the upgrade dialog is not displayed for any reason, you may also run the following command using Alt+F2:

gksu "sh /cdrom/cdromupgrade"

Or in Kubuntu run the following command using Alt+F2:

kdesudo "sh /cdrom/cdromupgrade"

Upgrading from a Torrent

If you're familiar with torrents and have an ISP that doesn't limit them, you can download the upgrade much more quickly. You'll also be sharing your bandwidth with other Ubuntu users and helping to reduce the load on the servers, which is especially beneficial on release days when the server overload causes problems.

Just visit http://releases.ubuntu.com/jaunty/, and download the appropriate torrent file for the alternate installation CD, found in the list towards the bottom of the page. (It will have a filename like ubuntu-9.04-beta-alternate-i386.iso.torrent.) Load it into your BitTorrent client, and after it is done downloading the ISO, follow the alternate CD upgrade instructions.

Friday, March 27, 2009

Lampp Problem To Open http://localhost

I have finished and success installing LAMPP in my intrepid. But when open http://localhost to see the detail configuration and status of LAMPP there is a warning like this:

Warning: file_get_contents(lang.xtmp) [function.file-get-contents]: failed to open stream: Permission denied in /opt/lampp/htdocs/xampp/index.php on line 2

Warning: Cannot modify header information - headers already sent by (output started at /opt/lampp/htdocs/xampp/index.php:2) in /opt/lampp/htdocs/xampp/index.php on line 4

To solve this problem, I modified modified lampp folder permission in /opt/lampp be like this "chmod -R 777 lampp"

Its worked

Pancasila - Indonesia Dictionary

Pancasila - Indonesia Dictionary, sebuah project pembuatan kamus untuk semua bahasa di indonesia

bahasa daerah - bahasa indonesia - bahasa inggris

Ubuntu Buddhist Edition : Buddhabuntu

Buddhabuntu is a distribution of Ubuntu Linux for Buddhist users that emphasizes machine learning, user adaptiveness, scriptural study and includes a media library of Buddhist scriptures. Its focus is on nodal / neural net processing and interdependent development and interfacing complearn and IBM PML with the OS for User Adaptiveness.

One can get involved in Buddhabuntu at http://buddhabuntu.8m.net . Looking for anyone with some programming experience and 'serious' interest. You may contact me, jasballz at raymonjc@sbu.edu or 1.585.307.0619 USA. Looking for people who are interested in devving machine learning O.S.-to-User interface for Ubuntu linux and maybe new compiz effects like an interbeing/indra's net desktop effect.

Ubuntu 9.04 Beta Released

The Ubuntu team is pleased to announce the beta release of Ubuntu 9.04 Desktop and Server editions. Codenamed "Jaunty Jackalope", 9.04 continues Ubuntu's proud tradition of integrating the latest and greatest open source technologies into a high-quality, easy-to-use Linux distribution.

Ubuntu 9.04 Desktop Edition brings faster boot speeds and a new notification system to your everyday computing experience.

Ubuntu 9.04 Server Edition makes it easy to experiment with cloud computing using Eucalyptus on your own servers, and sports an improved mail server integration stack based on postfix and dovecot.

The Ubuntu 9.04 family of variants, Kubuntu, Xubuntu, Ubuntu Studio, and Mythbuntu, also reach beta status today.

Desktop features
----------------
Faster boot times: improvements to Ubuntu's start-up process mean you can spend less time waiting and more time being productive with your Ubuntu desktop.

Notification system: notifications, those alerts that signify a change of status on your system or whether someone is contacting you, have been been made consistent across applications to provide a pleasing, intuitive experience for users.

Please see http://www.ubuntu.com/testing/jaunty/beta for details.

Server features
---------------

Cloud computing: Eucalyptus puts you in control of your own cloud computing infrastructure, compatible with Amazon's Elastic Compute Cloud (EC2) but running on your own servers behind your firewall. Ubuntu Server Edition 9.04 will also see Ubuntu available on Amazon EC2 -- making it the most complete cloud environment available today.

Turn-key mail servers: the dovecot-postfix package in Ubuntu 9.04 provides an all-in-one solution for deploying SMTP, POP3, and IMAP services with integrated server-side filtering support.

Kubuntu features
----------------

Kubuntu, built on the amazing KDE 4.2, brings users a complete,full-featured KDE4 desktop with many new applications and innovations.

Please see https://wiki.kubuntu.org/JauntyJackalope/Beta/Kubuntu for all the details.

Xubuntu features
----------------

Xubuntu comes with the light-weight Xfce 4.6 desktop environment for those who want a desktop that is easy to use, but places particular emphasis on conserving system resources.

Please see https://wiki.ubuntu.com/Xubuntu/JauntyJackalope/BetaAnnouncement for further details.

Ubuntu Studio features
---------------------

Ubuntu Studio includes updates to input hardware and sound device management from Ubuntu Desktop and a complete suite of tools for generation of audio, video, and graphic content.

The realtime kernel flavor (linux-rt) has returned and is again used by default in Ubuntu Studio. The rtirq script (http://alsa.opensrc.org/Rtirq) is also now included in the ubuntustudio-audio package. It is recommended that users not use the new EXT4 filesystem with the linux-rt kernel on production systems due to some reports of instability.

Jack-audio-connection-kit now includes support for the Free Firewire Audio Drivers (FFADO, www.ffado.org).

Mythbuntu features
------------------

As of 9.04, Mythbuntu fits better into the Ubuntu ecosystem by using the same build methods as all other remixes and derivatives. Because of this, 9.04 has been a focus around stability and preparing for an easy transition to the next version of MythTV (0.22) later this year.

See http://mythbuntu.org/9.04/beta for information about the Mythbuntu beta release.

To upgrade to Ubuntu 9.04 Beta from Ubuntu 8.10,follow these instructions:

https://help.ubuntu.com/community/JauntyUpgrades

Terminator

Terminator, multiple terminals in one window. The goal of this project is to produce a useful tool for arranging terminals. It is inspired by programs such as gnome-multi-term, quadkonsole, etc. in that the main focus is arranging terminals in grids (tabs is the most common default method, which Terminator also supports).

The robot future of terminals

Google Chromium Browser

Google Chrome is a browser that combines a minimal design with sophisticated technology to make the web faster, safer, and easier.

How to install:
1. System --> Administration --> Third-Party Software --> Add
2. On APT Line filled with "deb http://ppa.launchpad.net/chromium-daily/ppa/ubuntu intrepid main"
3. Open terminal and type "apt-get install chromium-browser"

Monday, March 16, 2009

Firewall

Discussions about firewalls often are passionate (just search the Ubuntu forums). By default, Ubuntu includes a firewall, iptables, but by default nothing is engaged. This is reasonable as a default Ubuntu install opens zero ports to the outside world, so a firewall is redundant. However, installing "server software" will cause ports to open, so some people like to use a firewall as a catch-all layer to find mistakes in their configuration.

Another use for firewalls is for the administrator to forcibly impose network policies on the user. For example, users may not talk to example.com, open up a listening port for remote connections, and so on.

Also, a periodic audit of the system for open ports is a good practice. For example, running the "nmap" command from another machine, or using one of many online port scanners:

http://nmap-online.com/
https://www.grc.com/x/ne.dll?bh0bkyd2

Remember, what you care about are open ports. Closed ports and stealth ports are equally secure, in that they are inaccessible to the public.

Iptables references :
update: I wrote an iptables reference here : bodhi's iptables primer.

The "problem" is iptables is not so new user friendly. Fortunately, there are several more user friendly interfaces available to allow you to manipulate your firewall (UFW, Firestarter, and Guarddog) :
  • UFW (Uncomplicated Firewall) is the newest tool. It is a command line tool and is, IMO, superior to the gui tools.
  • Firestarter is one of the most popular GUI front ends.
    How to Firestarter
    Default Firestarter Policies:
    Quote:
    • New inbound connections from the Internet to the firewall or client hosts are blocked.
    • The firewall host is freely allowed to establish new connections.
    • All client hosts are allowed to establish new connections to the Internet, but not to the firewall host.
    • Traffic from the Internet in response to connection requests from the firewall or client hosts is allowed back in through the firewall.

    This policy allows normal Internet usage such as web browsing and e-mail on the secured hosts, but blocks any attempts to access network services from the outside and shields the local network.
  • Guard dog uses the KDE libraries.
    Guarddog Online Guide
A source of confusion sometimes occurs when users feel the need to be running firestarter/Guarddog for their firewall to be active. This is untrue ! Keep in mind that these applications are not firewalls, but rather configuration tools for ip tables. These applications should be run only to configure your firewall. Once configured, IP tables (the actual firewall) is active (at boot) without having to run firestarter/guarddog. firestarter will monitor traffic, but it runs as root and there are better monitoring programs, so configure you firewall, shut down firestarter/grauddog, and let IP tables do the rest

Source : http://ubuntuforums.org

Saturday, March 14, 2009

T r u e C r y p t

Free open-source disk encryption software for Windows Vista/XP, Mac OS X, and Linux
Main Features:

* Creates a virtual encrypted disk within a file and mounts it as a real disk.

* Encrypts an entire partition or storage device such as USB flash drive or hard drive.

* Encrypts a partition or drive where Windows is installed (pre-boot authentication).

* Encryption is automatic, real-time (on-the-fly) and transparent.

* Provides two levels of plausible deniability, in case an adversary forces you to reveal the password:

1) Hidden volume (steganography) and hidden operating system.

2) No TrueCrypt volume can be identified (volumes cannot be distinguished from random data).

* Encryption algorithms: AES-256, Serpent, and Twofish. Mode of operation: XTS.

Further information regarding features of the software may be found in the documentation.

Source : http://www.truecrypt.org/

Ubuntu (philosophy)

Ubuntu, pronounced [ùbúntú], is an ethic or humanist philosophy focusing on people's allegiances and relations with each other. The word has its origin in the Bantu languages of Southern Africa. Ubuntu is seen as a traditional African concept.

Meaning

An attempt at a longer definition has been made by Archbishop Desmond Tutu (1999):

A person with Ubuntu is open and available to others, affirming of others, does not feel threatened that others are able and good, for he or she has a proper self-assurance that comes from knowing that he or she belongs in a greater whole and is diminished when others are humiliated or diminished, when others are tortured or oppressed.

Archbishop Desmond Tutu further explained Ubuntu as follows (2008):

One of the sayings in our country is Ubuntu - the essence of being human. Ubuntu speaks particularly about the fact that you can't exist as a human being in isolation. It speaks about our interconnectedness. You can't be human all by yourself, and when you have this quality - Ubuntu - you are known for your generosity.

We think of ourselves far too frequently as just individuals, separated from one another, whereas you are connected and what you do affects the whole world. When you do well, it spreads out; it is for the whole of humanity.


Louw (1998) suggests that the concept of ubuntu defines the individual in terms of their several relationships with others, and stresses the importance of ubuntu as a religious concept. He states that while the Zulu maxim umuntu ngumuntu ngabantu ("a person is a person through (other) persons") may have no apparent religious connotations in the context of Western society, in an African context it suggests that the person one is to become by behaving with humanity is an ancestor worthy of respect or veneration. Those who uphold the principle of ubuntu throughout their lives will, in death, achieve a unity with those still living.

Nelson Mandela explained Ubuntu as follows;

A traveller through a country would stop at a village and he didn't have to ask for food or for water. Once he stops, the people give him food, entertain him. That is one aspect of Ubuntu but it will have various aspects. Ubuntu does not mean that people should not address themselves. The question therefore is: Are you going to do so in order to enable the community around you to be able to improve?

Friday, March 13, 2009

SynCE

Overview

The purpose of the SynCE project is to provide a means of communication with a Windows Mobile device from a computer running Linux, *BSD or other unixes using USB or Bluetooth. One can then use one's computer to browse files, install applications and synchronize contacts, calendar and tasks with their PIM application of choice.

Documentation

  • SynceInstallation contains documentation to get SynCE working.

  • SynceSetup contains documentation on setting up SynCE for synchronization.

  • SynceTools outlines some other basic tools SynCE provides.

Download

Support

  • SynceChat - get in touch with the developers directly.

  • SynceMailingLists - connect to other users and enable you to query them for advice.

  • SynceBugs contains information on reporting bugs.

  • SynceDonate contains information on how to donate to the SynCE project.

Documentation for Legacy Devices

LegacyDevices contains the information on howto setup SynCE and OpenSync for older wm2003 devices

Source : http://www.synce.org

Monday, March 9, 2009

Dropbox [Store, Sync, and Share your files online]

Source : https://www.getdropbox.com

Have you ever wished that you could access your files from anywhere? We made Dropbox because we were tired of emailing files to ourselves or carrying around a USB key.

Once installed, any file you drop into your Dropbox folder will synchronize and be available on any other computer you've installed Dropbox on, as well as from the web. Also, any changes you make to files in your Dropbox will sync to your other computers, instantly.

Let's say you accidentally delete that 8 page report that you were supposed to have for a meeting tomorrow. A handy Dropbox feature is the ability to undelete files or pull up any previous versions of it.

You can also share files and folders with whomever you choose, whether it be music with buddies, docs with colleagues or photos with grandma, even if they're not Dropbox users.

We obsess over speed, and it shows. Dropbox is very smart about the way it handles files. For example, if you make a change to a huge file, dropbox will only update the piece of the file that changed.

All files are transported over SSL and encrypted using AES-256 (banks use this too).

Back In Time

Source : http://www.le-web.org

Back In Time is a simple backup system for Linux inspired from “flyback project” and “TimeVault”. The backup is done by taking snapshots of a specified set of directories.

Currently there are two GUI available: Gnome and KDE 4 (>= 4.1).

All you have to do is configure:

  • Where to save snapshot
  • What directories to backup
  • When backup should be done (manual, every hour, every day, every week, every month)

Table Of Contents

  1. Screenshots
  2. Documentation
    1. Getting Started
    2. Main Window
    3. Settings Dialog
    4. Snapshots Dialog
    5. Integration with Nautilus
  3. FAQ
  4. Change Log
  5. Download
  6. Ubuntu Hardy & Intrepid repository

Screenshots

Gnome
Main Window Settings Dialog Snapshots Dialog Snapshots Dialog (2)
KDE 4
Main Window Settings Dialog Snapshots Dialog Diff Options Dialog

Top

Documentation

Why did I write the application ? When I read about Apple’s TimeMachine I thought it’s nice tool to have. I searched for equivalent applications for Linux and I find TimeValut and FlyBack. I didn’t feel very comfortable with TimeVault, especialy with it’s timeline. FlyBack was almost what I was looking for: I wanted a Places/Bookmarks column and I wanted snapshots only when something changed (just to reduce the number of snapshots).

Keep in mind that Back In Time is just a GUI. The real magic is done by rsync (take snapshots and restore), diff (check if somethind changed) and cp (make hardlinks).

Back In Time acts as a “user mode” backup system. This means that you can backup/restore only folders you have write access to (actually you can backup read-only folders, but you can’t restore them).

A new snapshot is created only if something changed since the last snapshot (if any).

A snapshot contains all the files from the selected directories (except for exclude patterns). In order to reduce disk space it use hard\-links (if possible) between snapshots for unchanged files. This way a file of 10Mb, unchanged for 10 snapshots, will use only 10Mb on the disk.

When you restore a file ‘A’, if it already exists on the file system it will be renamed to ‘A.backup.’.

For automatic backup it use “cron” so there is no need for a daemon, but “cron” must be running.

Top

Getting Started

You can start the application in the following ways:

  • Applications Menu: System Tools > Back In Time
  • Command line:
backintime [ [--snapshots] path | --backup | --version | --help ]
  • path: go directly to the specified file or directory
  • -s, –snapshots: go directly to SnapshotsDialogs
  • -b, –backup: take a snapshot now (if needed)
  • -v, –version: show version and exit
  • -h, –help: show a small help and exit

Top

Main Window

Gnome KDE 4

The main window is divided in 3 lists:

  1. Timeline: allow you to navigate between ‘now’ and snapshots
  2. Places: allow to quickly navigate to special folders: home, root, bookmarks and directories to backup
  3. Files: allow to navigate through the file system at the moment specified in timeline list. Files can be opened (double-click) using gnome file association. Keep in mind that snapshots are ‘readonly’. You can sort items by name (folders always first), by size or by date.

If you right-click and item in the file list you will see the following menu:

  • Open the item using gnome-open
  • Copy selected item (you can paste it into your file-manager)
  • Snapshots: show all snapshots for the current file/directory
  • Restore (only for snapshots items) selected file/directory

Main toolbar (the one on the left) items are:

  • Take a new snapshot now
  • Set snapshot name
  • Remove snapshot
  • Show configure dialog
  • Show about dialog
  • Show help
  • Quit the application

Files toolbar (the one on the right) items are:

  • Go to parent directory
  • Current path
  • Show/Hide hidden (.*) and backup (*~) files
  • Restore current file/directory
  • Copy current file/directory
  • Show all snapshots for the current file/directory

Top

Settings Dialog

Gnome KDE 4

Where to save snapshots is self-explaining.

What to backup define the directories you want to backup. From this directories you can exclude some files/directories using exclude pattern. By default it exclude hidden (”.*”) and “*.backup*” files/directories.

Automatic backup can be set to: none (default), every 5 minutes, every 10 minutes, every hour, every day, every week, every month. If your backup directory is on a removable drive (ex: usb-drive) it is recommended to set automatic backup to none and take manual snapshots when the drive is plugged.

You can automatically remove snapshots older then a specific date or if the free space is less then a specified value. By default automatic remove don’t remove named snapshots.

Top

Snapshots Dialog

Gnome KDE 4

Show all snapshots for a specific file or directory.

Double-click an item in the snapshots list to open it with gnome file associations.

When you select an item, you can (from right-click menu or from toolbar and buttons):

  • jump to
  • copy to clipboard
  • compare it with another snapshot (by default it use meld, but you can change this from ‘Diff Options’)
  • restore it (only for snapshots)

Top

Integration with Nautilus

It is not are “real” integration with Nautilus but it is simple to setup.

You need to install nautilus-actions. On Ubuntu you can install it with the command:

sudo apt-get install nautilus-actions

Now just create an action from System menu: Preferences > Nautilus Actions Configuration.

Step 1. Click Add button

Step 2. Menu Item & Action Tab

Parameters:

  • %M: go to specified path
  • –snapshots %M: go to SnapshotsDialog

Step 3. Conditions Tab

Step 4. Advanced conditions Tab

Step 5. Click OK button, and you should see the new action in actions list


Ubuntu Hardy & Intrepid repository

I setup a small repository to make updates easier.

You need to add the following line to your apt sources file (/etc/apt/sources.list)

deb http://www.le-web.org/repository2 stable main

and then add the GPG key information:

wget http://www.le-web.org/repository2/le-web.key
sudo apt-key add le-web.key

Then to install the the application for Gnome:

sudo apt-get update
sudo apt-get install backintime-common backintime-gnome

or KDE4 (>= 4.1):

sudo apt-get update
sudo apt-get install backintime-common backintime-kde4

Saturday, March 7, 2009

Tools Download Rapidshare Free

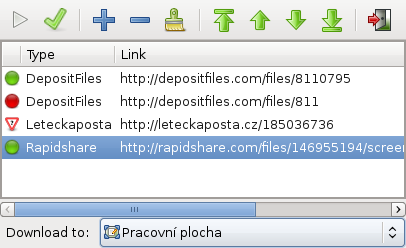
Slimrat is a command line and GUI utility for downloading files from Rapidshare (Free) on Linux. Written in perl, uses wget and GTK GUI.

News

Supported servers:


Installation and Use of Slimrat
Slimrat is a utility base on command lineand GUI for download file from Rapidshrae (Free) and some other famous file hosting.
1. Download
2. For ubuntu
$ sudo apt-get install libwww-mechanize-perl libgtk2-gladexml-perl
3. Ekstract file slimrat-0.9.3.tar.bz2
4. Add position PATH slimrat application in .bashrc
$ sudo nano .bashrc
....
#PATH TAMBAHAN
PATH=$PATH:~/slimrat-0.9.3
export PATH
5. Run application
# slimrat --help (CLI)
# slimrat-gui (GUI)
6. For downloading file
# slimrat http://rapidshare.com/files1
http://rapidshare.com/files2
7. If there is more file to download, make the link at text file
# slimrat -l download.txt

KVM Switch Based Software

Introduction

synergy: [noun] a mutually advantageous conjunction of distinct elements

Synergy lets you easily share a single mouse and keyboard between multiple computers with different operating systems, each with its own display, without special hardware. It's intended for users with multiple computers on their desk since each system uses its own monitor(s).

Redirecting the mouse and keyboard is as simple as moving the mouse off the edge of your screen. Synergy also merges the clipboards of all the systems into one, allowing cut-and-paste between systems. Furthermore, it synchronizes screen savers so they all start and stop together and, if screen locking is enabled, only one screen requires a password to unlock them all. Learn more about how it works.

Synergy is open source and released under the GNU Public License (GPL).

System Requirements

  • Microsoft Windows 95, Windows 98, Windows Me (the Windows 95 family)
  • Microsoft Windows NT, Windows 2000, Windows XP (the Windows NT family)
  • Mac OS X 10.2 or higher
  • Unix
    • X Windows version 11 revision 4 or up
    • XTEST extension
      (use "xdpyinfo | grep XTEST" to check for XTEST)
All systems must support TCP/IP networking.

"Unix" includes Linux, Solaris, Irix and other variants. Synergy has only been extensively tested on Linux and may not work completely or at all on other versions of Unix. Patches are welcome (including patches that package binaries) at the patches page.

The Mac OS X port is incomplete. It does not synchronize the screen saver, only text clipboard data works (i.e. HTML and bitmap data do not work), the cursor won't hide when not on the screen, and there may be problems with mouse wheel acceleration. Other problems should be filed as bugs.

1. Install Synergy
$ sudo apt-get install synergy
$ sudo aptitude install synergy

2. Configure Synergy
Configuration file is saved in /etc/synergy.conf and configuration file sample is saved in /usr/share/doc/synergy/examples.
You could copy it to /etc and edit the file.

There are four main section in synergy.conf, screen, link, aliases and options.
Every section started with section word followed by section name and finished with end word.

- Screen contain computer name which share the keyboard and mouse.
Example:
section: screens
ubuntu:
fedora:
end

- Links, contain the position of main screen and client screen
section: links
ubuntu:
right = fedora
fedora:
left ubuntu
end

- Aliases
section: aliases
ubuntu:
192.168.1.1
fedora:
192.168.1.2
end

- Options, to lock keyboard and mouse in a screen by press F2
section: options
keystroke(f12) = lockCursorToScreen(toggle)
end

3. Running Synergy
$ synergys -f --name ubuntu
On the client


Friday, March 6, 2009

FlightGear is an open-source flight simulator

The FlightGear flight simulator project is an open-source, multi-platform, cooperative flight simulator development project. Source code for the entire project is available and licensed under the GNU General Public License.

The goal of the FlightGear project is to create a sophisticated flight simulator framework for use in research or academic environments, for the development and pursuit of other interesting flight simulation ideas, and as an end-user application. We are developing a sophisticated, open simulation framework that can be expanded and improved upon by anyone interested in contributing.

There are many exciting possibilities for an open, free flight sim. We hope that this project will be interesting and useful to many people in many areas.

FlightGear v1.9.1 is now available. Check out the gallery page and start downloading here: [Mirror 1] [Mirror 2] [Mirror 3]

OpenMeetings - Video Chat Conference

Features

Download OpenMeetings

PlayOnLinux

PlayOnLinux is a piece of sofware which allows you to easily install and usegames and softwares designed to run with Microsoft®'s Windows® numerous .

Few games are compatible with GNU/Linux at the moment and it certainly is a factor preventing the migration to this system. PlayOnLinux brings an accessible and efficient solution to this problem, cost-free and rescpetful of the free softwares.
Get rid of Windows®' constraints! But keep on playing!

All you have to do is...

Download

Latest release: 3.3.1

openSUSE 11.1 Released!

The openSUSE Project is proud to announce the release of openSUSE 11.1. The openSUSE 11.1 release includes more than 230 new features, improvements to YaST, major updates to GNOME, KDE, OpenOffice.org, and more freedom with a brand new license, Liberation fonts, and openJDK. This is also the first release built entirely in the openSUSE Build Service.

openSUSE Installer

All of the Sneak Peeks for this release are available at on openSUSE News. You can also find a bevy of screenshots, and a list of features found in openSUSE 11.1. You can also find a lengthy list of packages and version numbers on DistroWatch.

Let’s take a look at some of the specific additions in openSUSE 11.1!

On the Desktop

Desktop users will find a lot to like in this release. Users can choose from the leading edge of GNOME and KDE development with GNOME 2.24.1 and KDE 4.1.3. We’ve also included KDE 3.5.10 for users who prefer the classic KDE experience.

What’s new in GNOME 2.24.1?

GNOME has gotten a good set of improvements since the 11.0 release. GNOME 2.24.1 features tabbed browsing and a new compact view in Nautilus, improvements for Gmail users in Evolution, along with mail templates, a new version of Ekiga, and additional improvements in F-Spot.

This release also includes a brand-new release of the ever-popular Banshee. Banshee 1.4 sports support for Internet radio, compilation albums, a Now Playing window for video and audio, support for syncing to Android phones, and many other features that make Banshee an excellent multimedia player for the Linux desktop.

GNOME Desktop

GNOME Desktop Apps

What’s new in KDE 4.1.3?

KDE 4 has a huge number of improvements since openSUSE 11.0. In this release you’ll find the KDE-PIM suite back in KDE 4, new games, the KSCD CD player, KSystemLog to keep track of system changes, improvements to Dolphin, Konqueror, and Marble integration with OpenStreetMap. KDE has now standardized on PackageKit for its backend, which means both desktops are using the same update stack.

KWin effects: cube

KDE cover flow

The openSUSE KDE team has also backported some key features from KDE 4.2, including compositing features for KWin to provide more desktop effects, and auto-hiding of the panel, and power management thanks to PowerDevil.

Classic KDE

If you’re not quite ready to make the transition to KDE 4, relax. openSUSE 11.1 includes KDE 3.5.10 for the “classic” KDE experience. Simply install openSUSE 11.1 from the DVD media and choose KDE 3.5.10 from the selection of other window managers in the desktop selection screen.

OpenOffice.org

This release includes OpenOffice.org 3.0, which features many improvements over the 2.4 release found in openSUSE 11.0. OpenOffice.org 3.0 Novell edition provides better Excel interoperability, performance enhancements, 3D slide transitions, and other features not found in upstream OpenOffice.org.

This release also includes support for ODF 1.2, import filters for OOXML, Gstreamer and Mono integration, and a lot more. For developers, this is the first release that includes the split build, making it easier to work on components of OpenOffice.org and get involved in its development.

Under the Hood

openSUSE 11.1 also includes several changes “under the hood,” including a new kernel release, updated Glibc, new version of PackageKit, Smolt integration, and many other updated applications and utilities:

  • Linux 2.6.27.7
  • Glibc 2.9
  • Python 2.6
  • Perl 5.10
  • Mono 2.0

YaST Improvements

The YaST team has been busy with this release, working on a number of improvements including new and re-written modules. openSUSE 11.1 includes a new printer module, redesigned partitioner module, and a security module that allows you to check the overall security of your system.

Media and Download

openSUSE is now available for immediate download. openSUSE 11.1 comes with many choices of installation media.

  • openSUSE 11.1 DVD 32-bit
  • openSUSE 11.1 DVD 64-bit
  • openSUSE 11.1 DVD PowerPC
  • openSUSE 11.1 GNOME 32-bit Live CD
  • openSUSE 11.1 KDE 4 32-bit Live CD
  • openSUSE 11.1 GNOME 64-bit Live CD
  • openSUSE 11.1 KDE 4 64-bit Live CD

You can also purchase a retail box with openSUSE 11.1 that includes 90-day installation support, physical media, and a printed Getting Started guide.

Communicate

We want to hear from you! The openSUSE Project has many channels of communication:

To keep up to date with openSUSE, be sure to keep an eye on openSUSE NewsPlanet SUSE for blog posts from the openSUSE community. and watch

Want to help the openSUSE Project? To get involved with openSUSE see the How to Participate page on the openSUSE wiki. We can use lots of different skills to help the project, so feel free to jump in!

Thanks!

openSUSE 11.1 represents the combined effort of thousands of developers who participate in openSUSE and upstream projects shipped in openSUSE. The contributors, inside and outside the openSUSE Project, should be proud of this release, and they deserve a major “thank you” for all of the hard work and care that have gone into 11.1. We hope that openSUSE 11.1 is the best openSUSE release yet, and that it will help to encourage the use of Linux everywhere! We hope that you have a lot of fun while you use openSUSE 11.1, and we look forward to working with you on 11.2!